Wednesday 12 December 2012

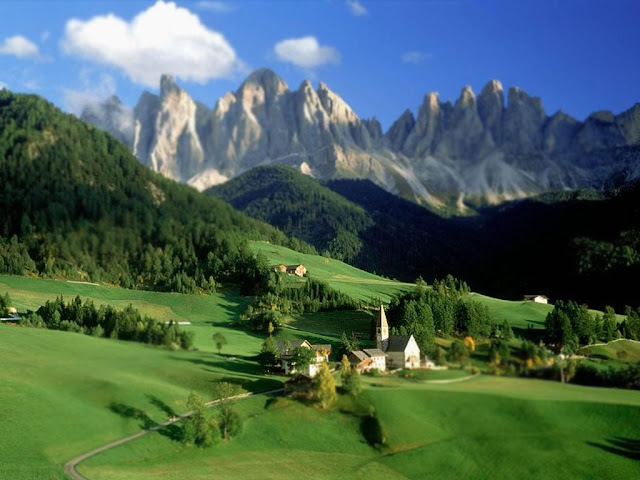
blur and sharpen

ORIGINAL
Open Image in photoshop
Then I used the blur tool I set the strength to 80
Then I used the brush over the clouds
Then gradually as I came down I reduced the Strength so for the mountains to 65 and painted over them.
Then for the grass I used 50
After that I selected the sharen tool and sharpened the middle area to make the church appear like a modelchurch.


Wednesday 5 December 2012

Healing tools Birds


 Original image
 Open image in Photoshop
Press the letter “J”
Select Healing brush tool
Then press alt and click on a bird
Then simply just brush it on some where else.
Spot healing brush tool will get rid of any bits you don’t want.

Healing tools wall


This is the original image of the broken wall.
  1. open your image in photoshop
  2. press the letter "J" 
  3. go to the side bar and select the tool highlighted
  4. the to fill in small spaces i used the " healing brush tool"
  5. hold Alt to select the area you want and then jus move the brush to the gap and fill in.
  6. To do the bgger section in the middle I used the "patch tool" 
  7. So i made a circle around the big whole and moved it so that i was happy until the wall matched the gap.


Friday 30 November 2012

Don Don Don


  1.  Open an image of Don and a building in Photoshop
  2. Select the Polygonal lasoo tool and trace out the subject i.e. Don.
  3. Select the "Q" key to erase any bits then select "Q" again.
  4. The press "control, T" 
  5. Then press "select, modify, feather" Then "Ok"
  6. Then simply drag Don to the building image.
  7. press "Control T" to adjust the size and rotation and double click. :)

Wednesday 28 November 2012

Broken glass

I saved a picture of broken and glass and one of Rihanna, I dragged them both on to photoshop. Then hold shift down and drag the broken glass over rihanna. Then I changed the layer to screen Which made Rihanna's face appear behind the broken glass. Then I went to edit and Freen transform which lets me move the image around.

Wednesday 21 November 2012

photoshop sugar

Alan sugar

To start off I coppied an image of Alan sugar in to photoshop and a bag of sugar then I selected the Lasoo tool and went around his face then pressed "Q". After that the background went red and I selected the brush tool to go around any bits that I had over done. Then I pressed "Q" again to get off it then SELECT- MODIFY- FATHER and then ok.
after that I dragged Alan Sugars face over to the Sugar bag then double clicked to place it, then I did duplicate layer to get another face and double clicked it, and repeated this process till I had 3 Alan Sugars.